

12:57 am


DIY On Board Air -- ARB CKMA12 and 5 Gallon Tank
Thought this might be useful up in here.
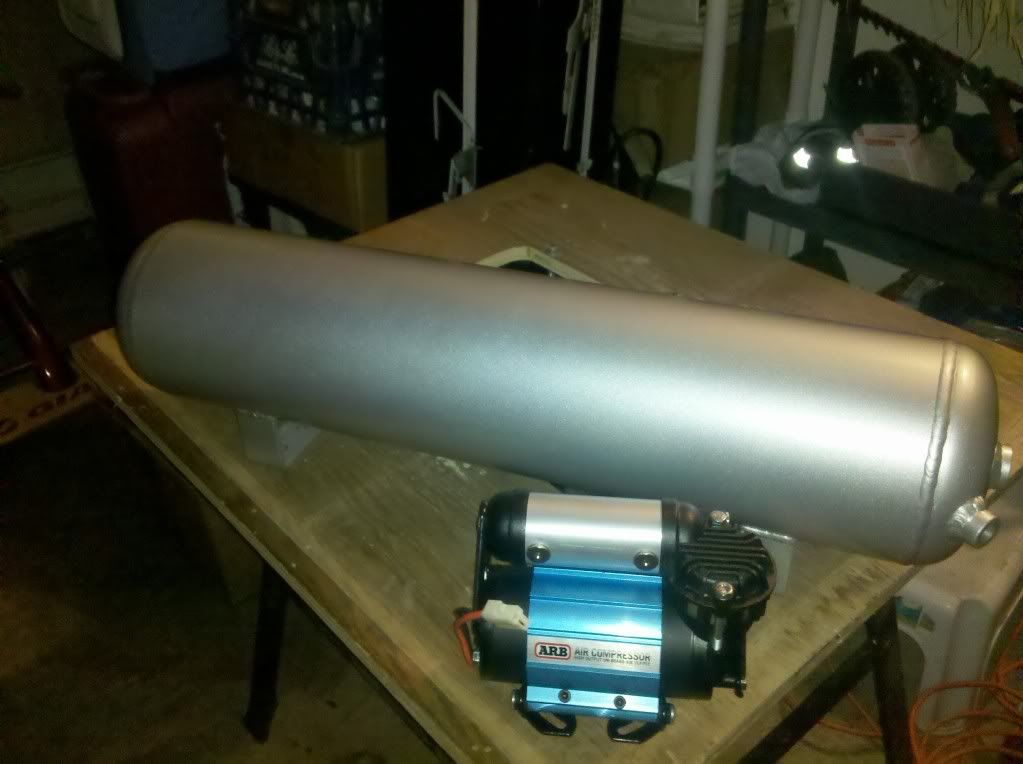
This is a common air compressor for offroading these days being used for ARB air lockers. Additionally, this compressor is able to fill tires.
**Note: this compressor is not rated to run air tools: 2.18 CFM @ 29 psi
Choice of tank (size, orientation, number of ports) is vehicle and owner dependent. Use the DIY as a guideline for your configuration.
I wrote this up to document what I've done so far and plan to add any changes as it is only ~90% complete.
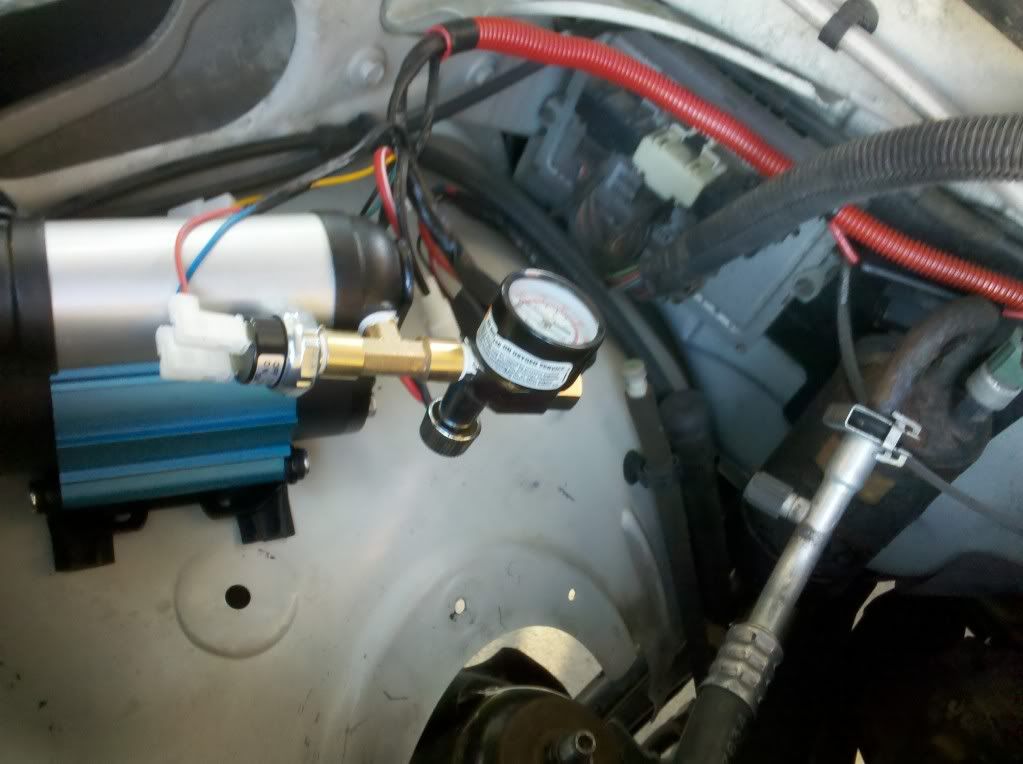
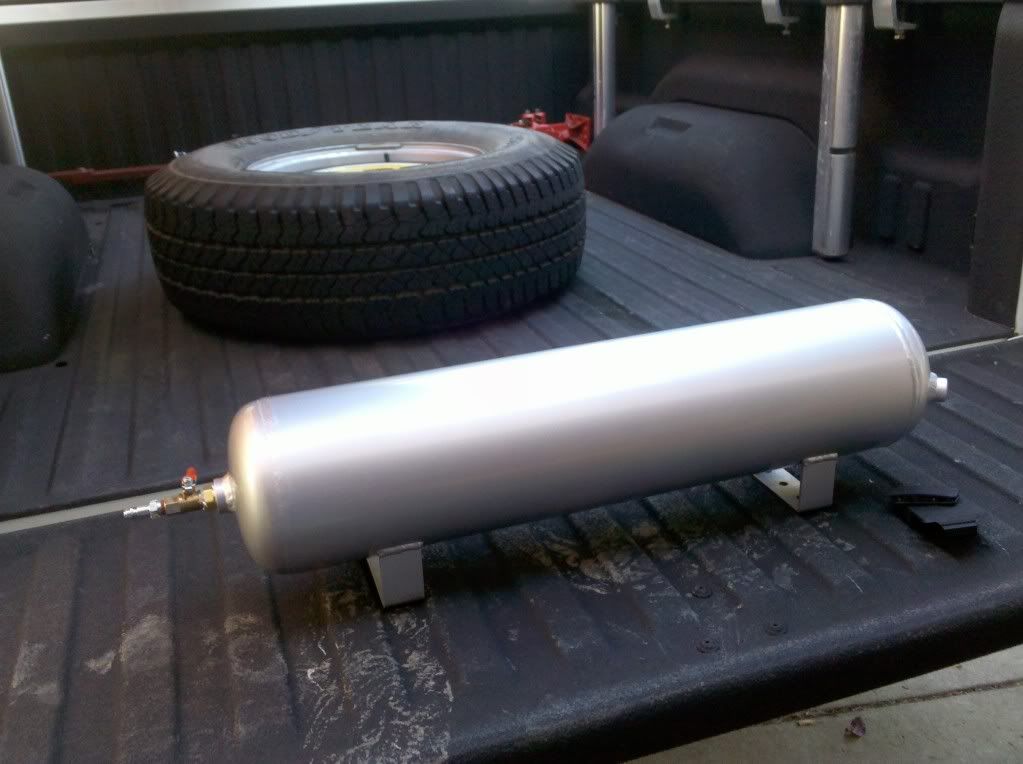
Here is the compressor and tank. Tank purchased off ebay. Shipping is the most inhibiting aspect. I did not find, what I thought, good deals from offroad shops or other stores. Best bet for low dollar, decent tank, is a semi-truck junkyard or salvage yard, such that you can get an air suspension tank. They are already rated for high pressure and plenty of ports. Mounting straps even accompany them. Unfortunately, I couldn't get one of these due to travel distance.

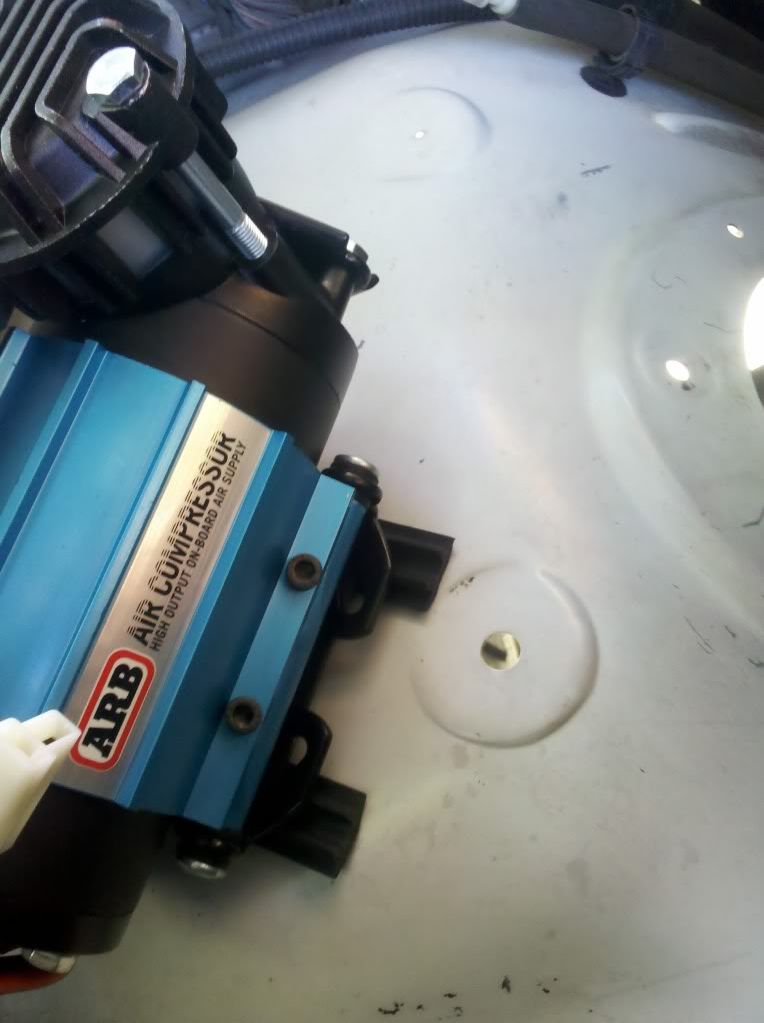
Use mounting plate to locate the compressor install spot. You can see my pilot holes drilled. I had already prefit for this lcoation.
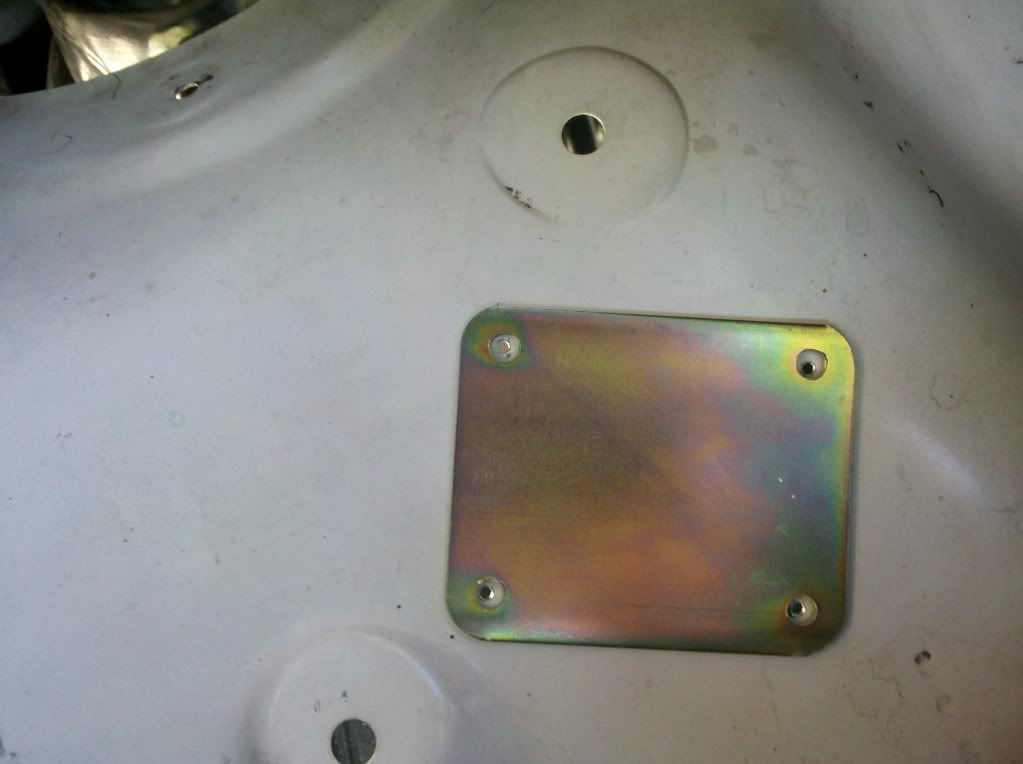
I went and painted the mounting plate 😉

I had some rubber laying around (from my thule rack system) and used for vibration isolation.
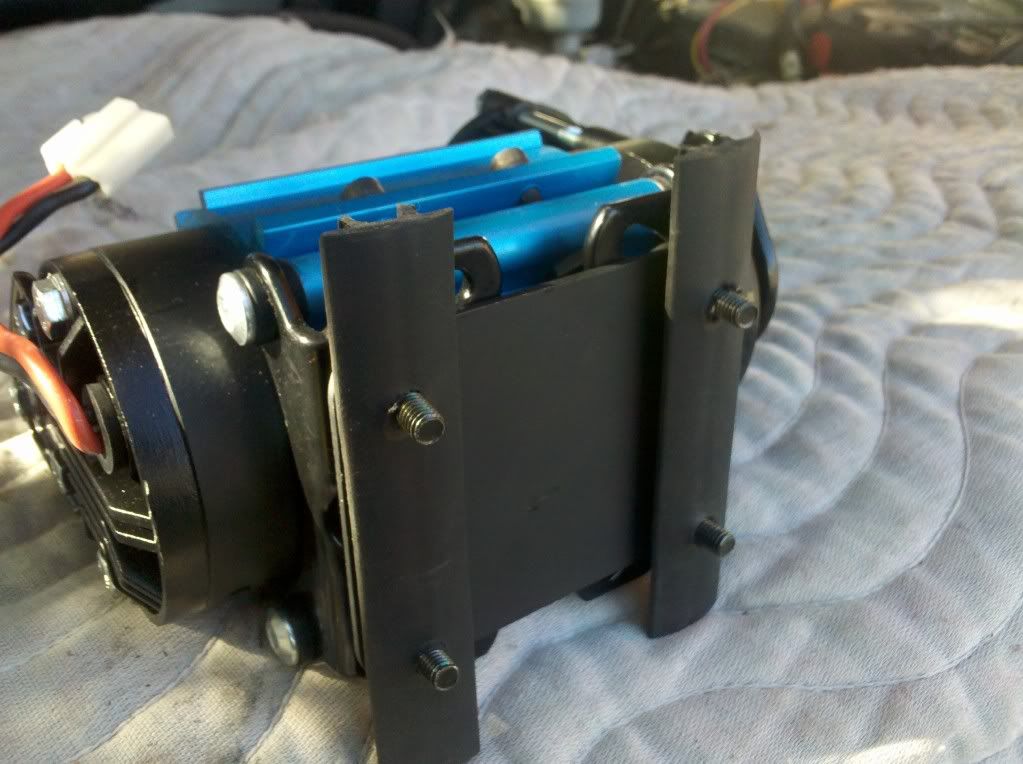
Set in place with mounting plate and rubber.
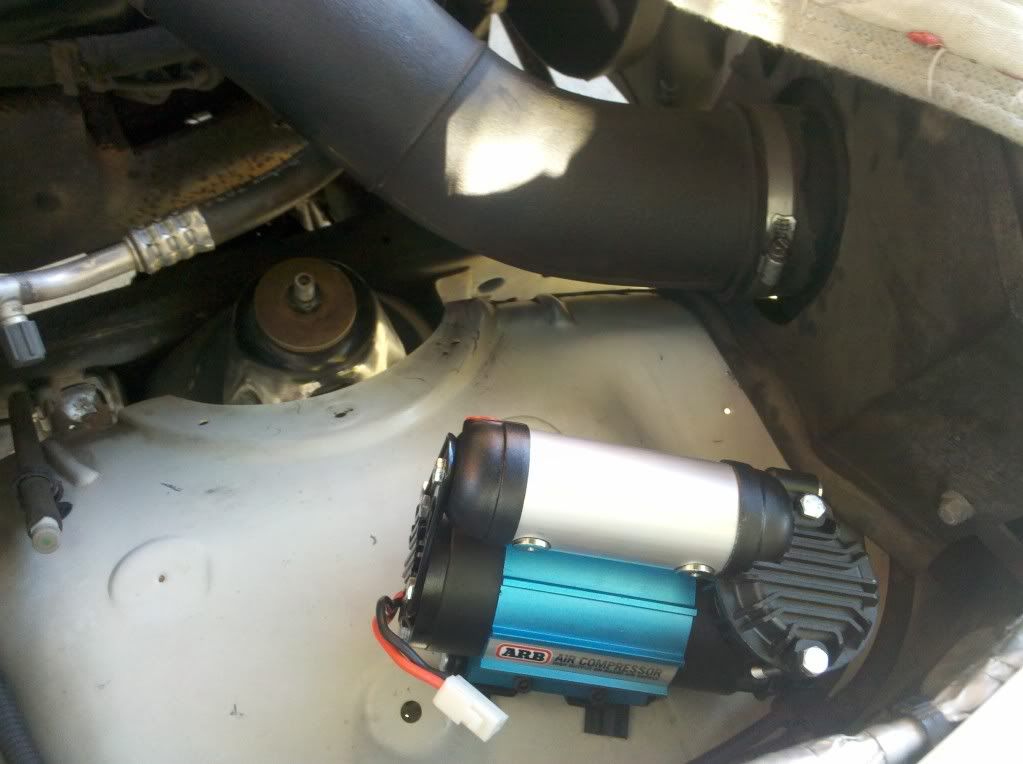
Bottom side of the wheel well. Those of you with wheel well covers, you'll have to remove them. You can get replacement grommets at Autozone. They are 1/4" size and come in packs of 10. They have a phillips head screw that engages and spreads the wings.

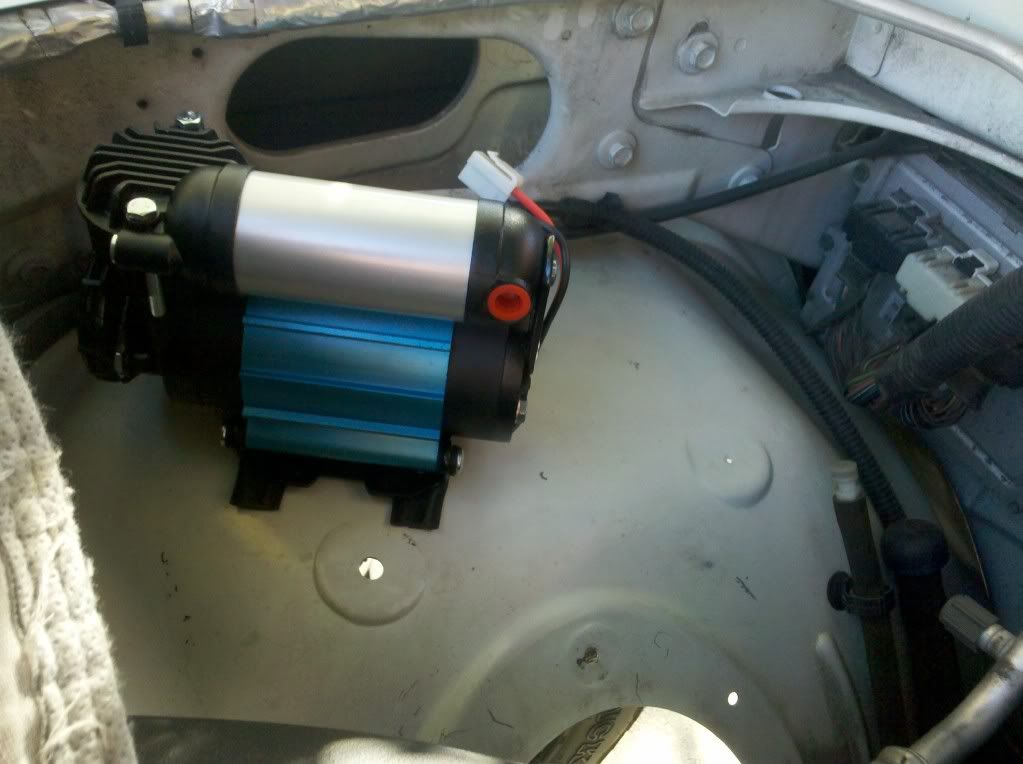
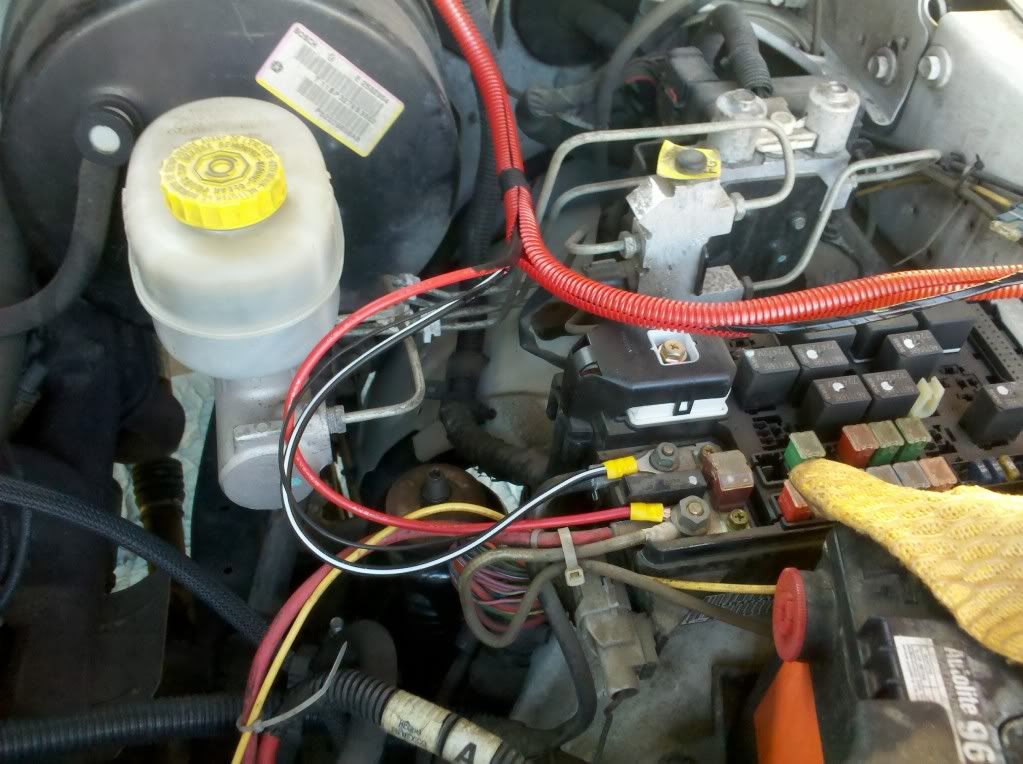
Wiring installed. Added the wiring conduit for protection, ease of routing, and identification. Note that the relay is mounted to the wheel well (black box on the left).
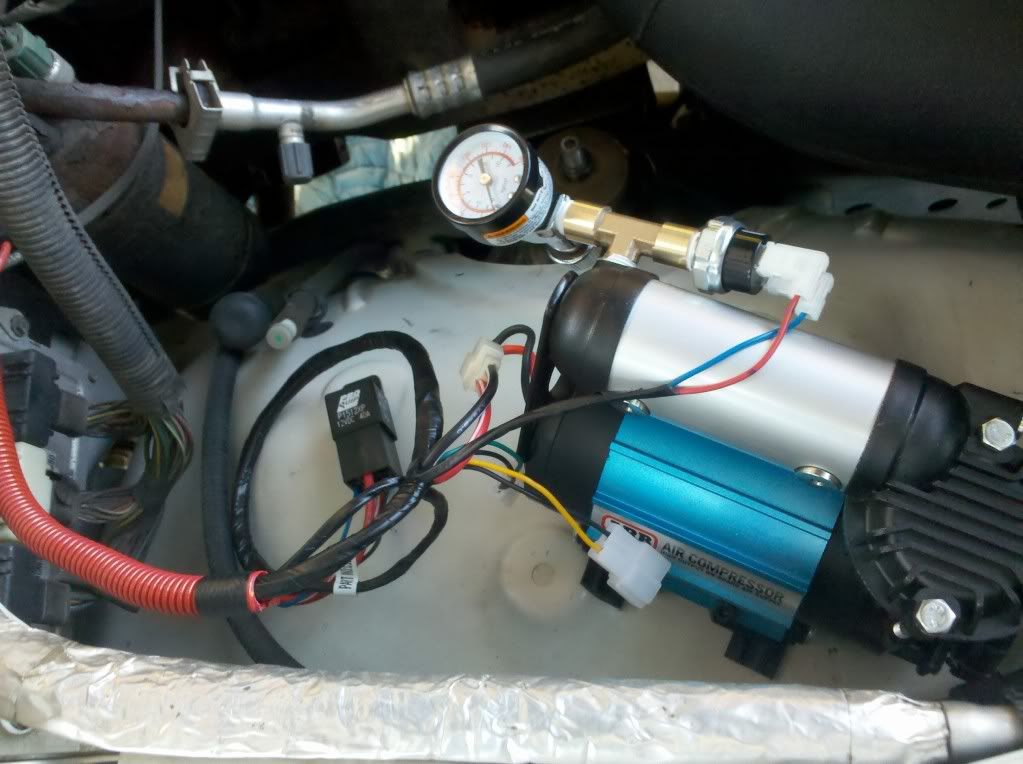
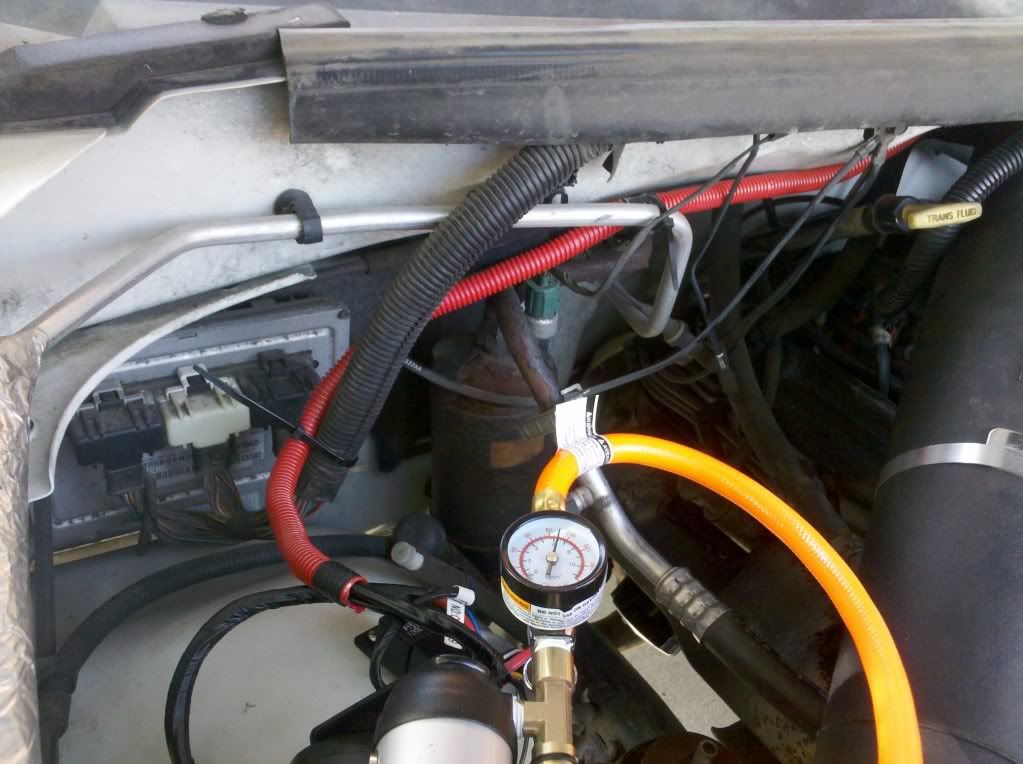
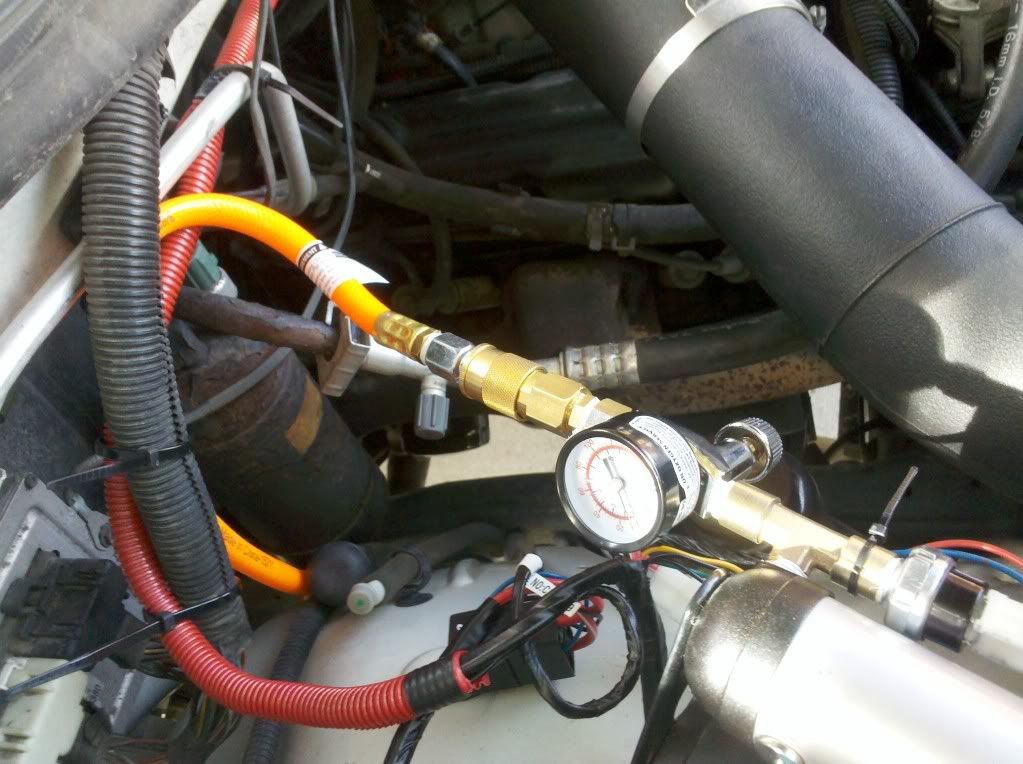
Current setup has a T-fitting, the pressure switch that came with the compressor, and a cheap pressure gauge. All 1/4" npt.
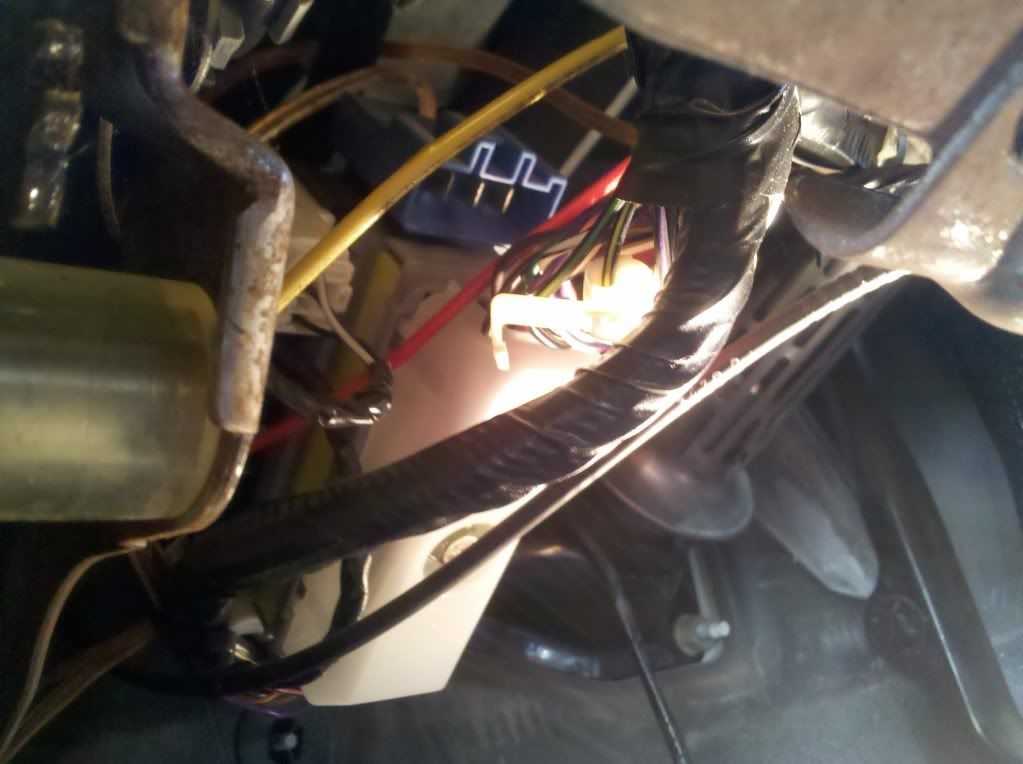
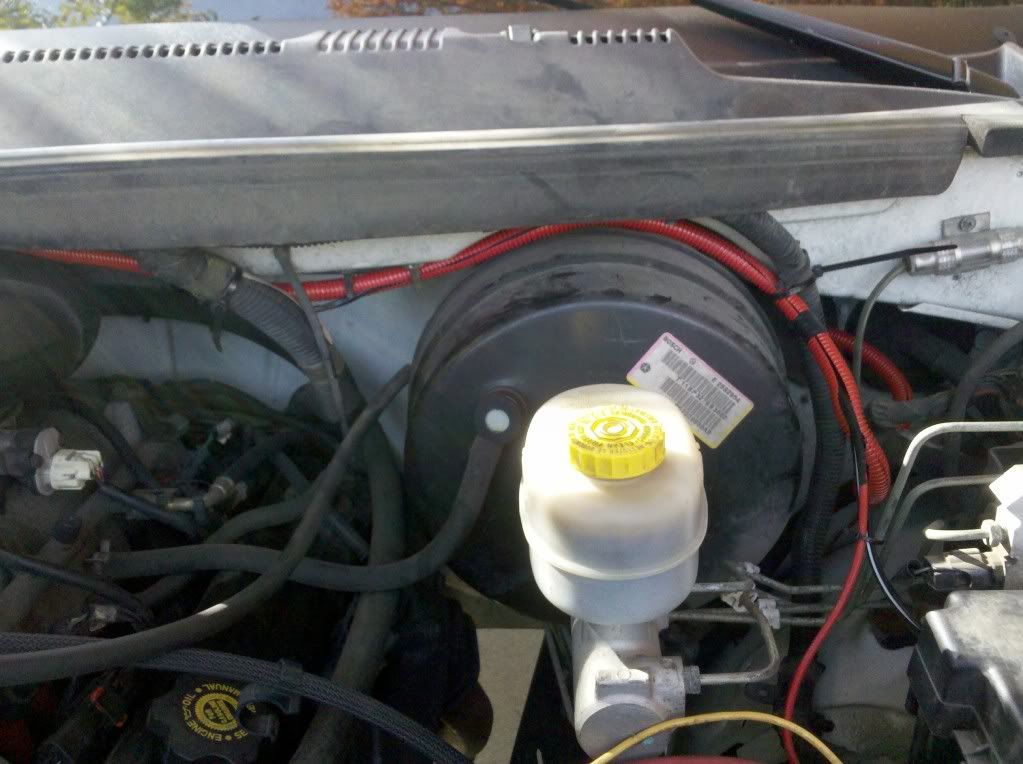
Wiring for Hot and Ground. The conduit off to the right is the harness that goes into the firewall. That location back behind the brake master cylinder.
Fire wall access. I poked through the diamond shaped rubber on the left. The hole for the hood cable was maxed out.
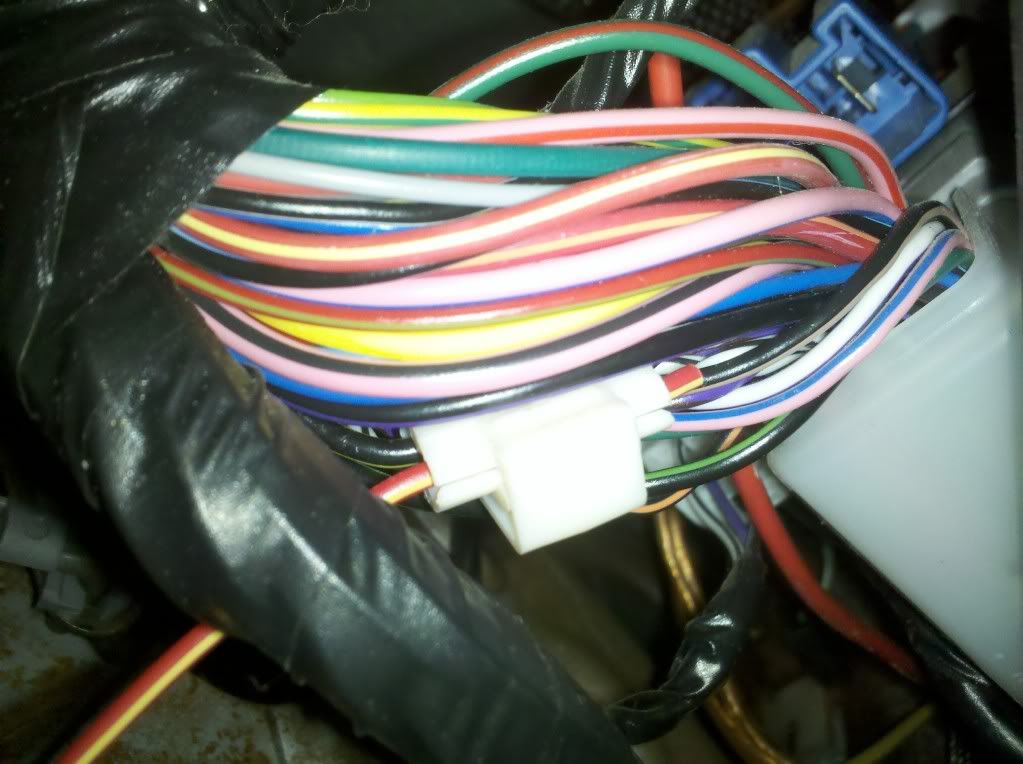
So now wiring inside the cab. This is the wire bundle right on the steering column upon removing the kick panel. Three screws across bottom, then lift panel straight out and up.
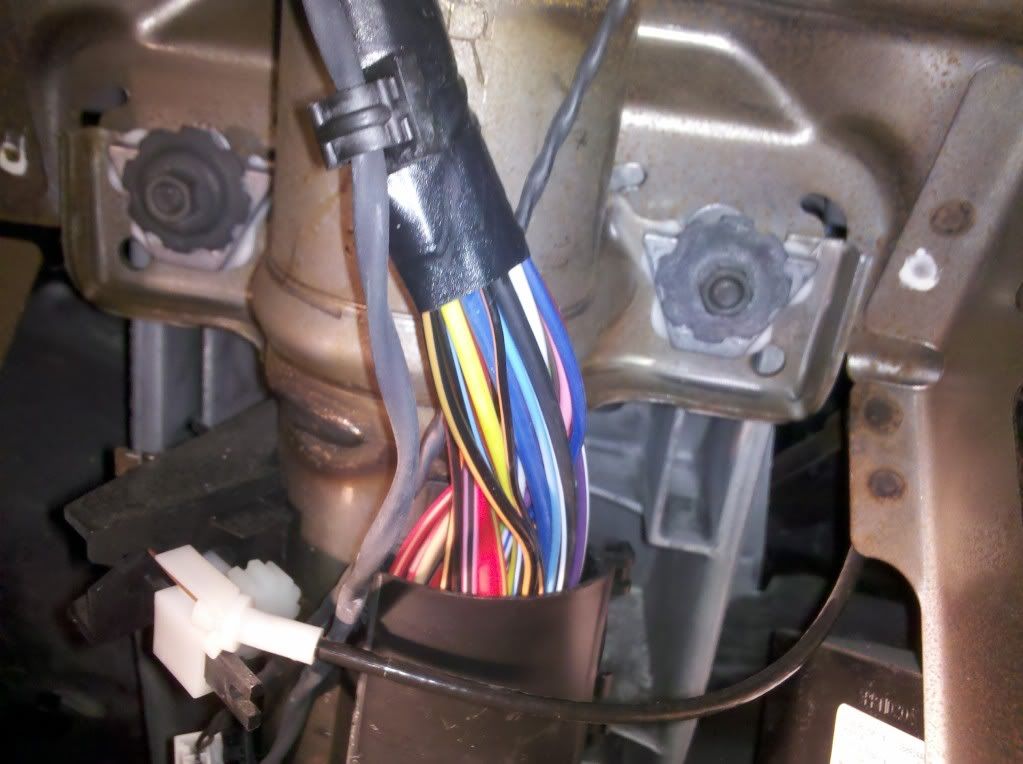
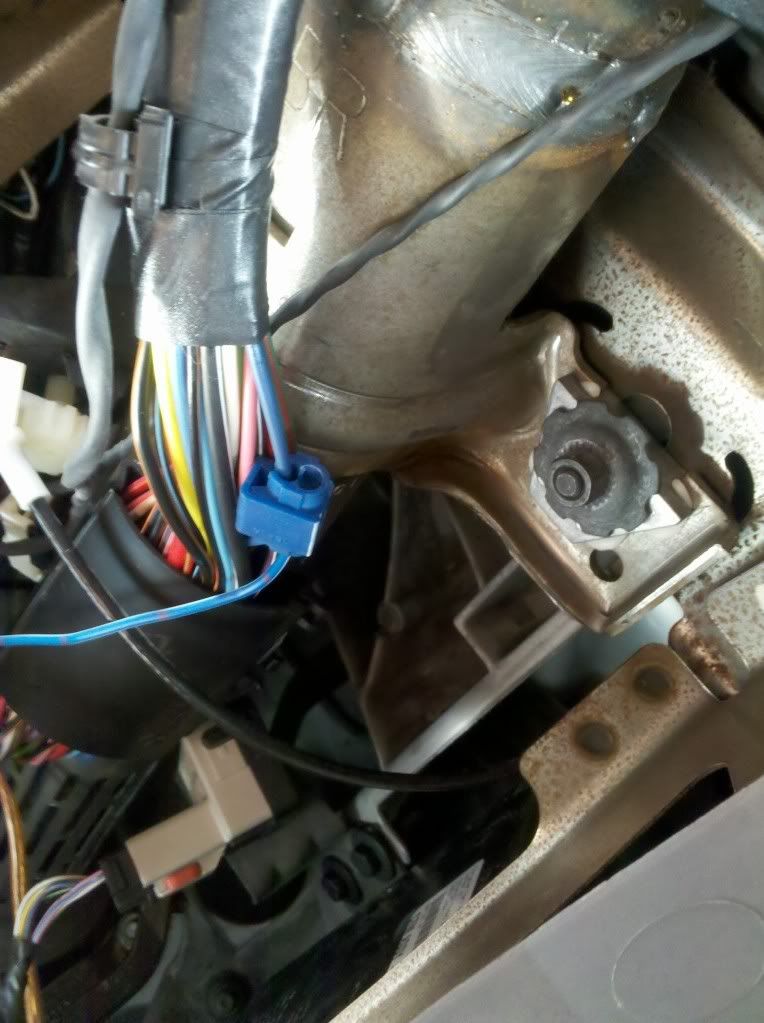
Used the Black and Yellow wire for Dash Illumination!!
Tried to use Black and Orange for Ignition. This one did NOT work. See next picture for correct wire, Dark Blue!!
Used the small DARK Blue wire for Ignition.
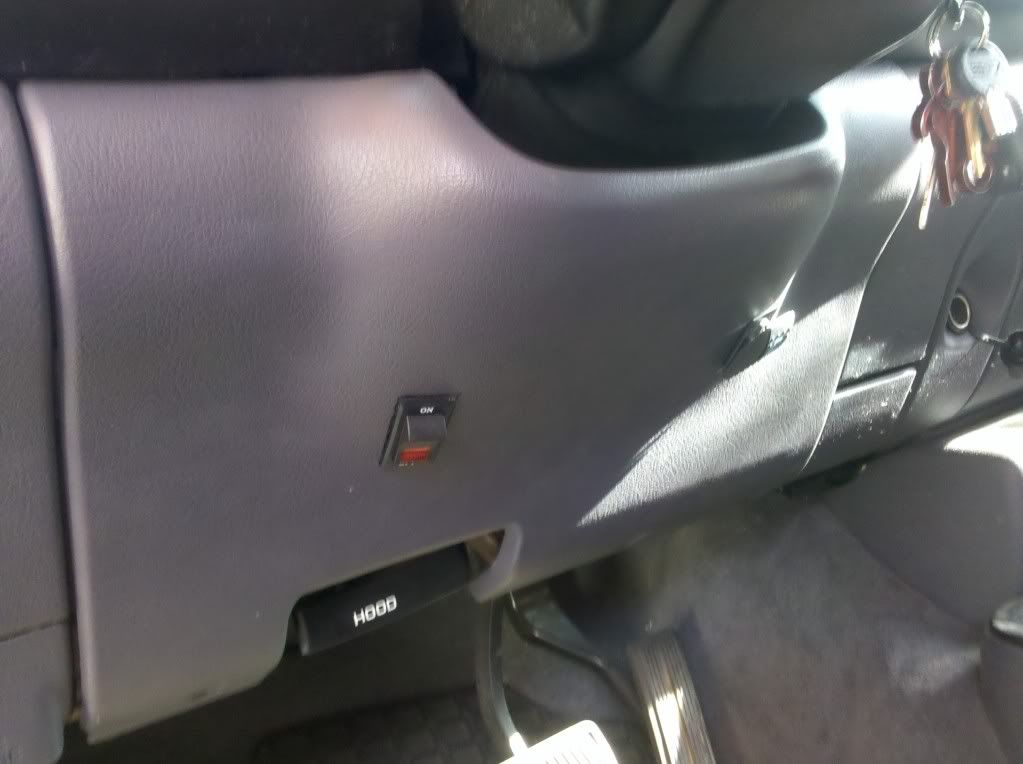
Kick Panel done. Left switch is Aux light in rear. Right switch is the compressor isolator switch. Start vehicle, then flip switch for compressor to run.
System tested with air line hooked up. Got 100' from HD for ~$25. Red wiring conduit all zip tied in place.
Zip tied on Driver Side.
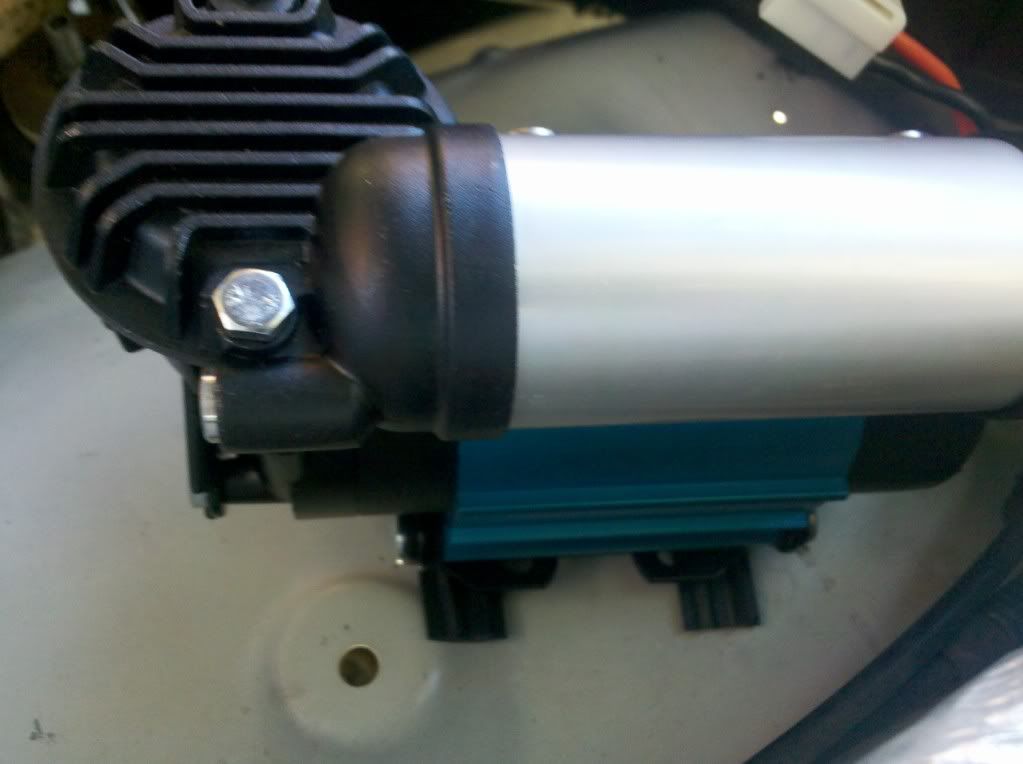
Added Quick Connect at Comopressor for eash removal or changes in the future.
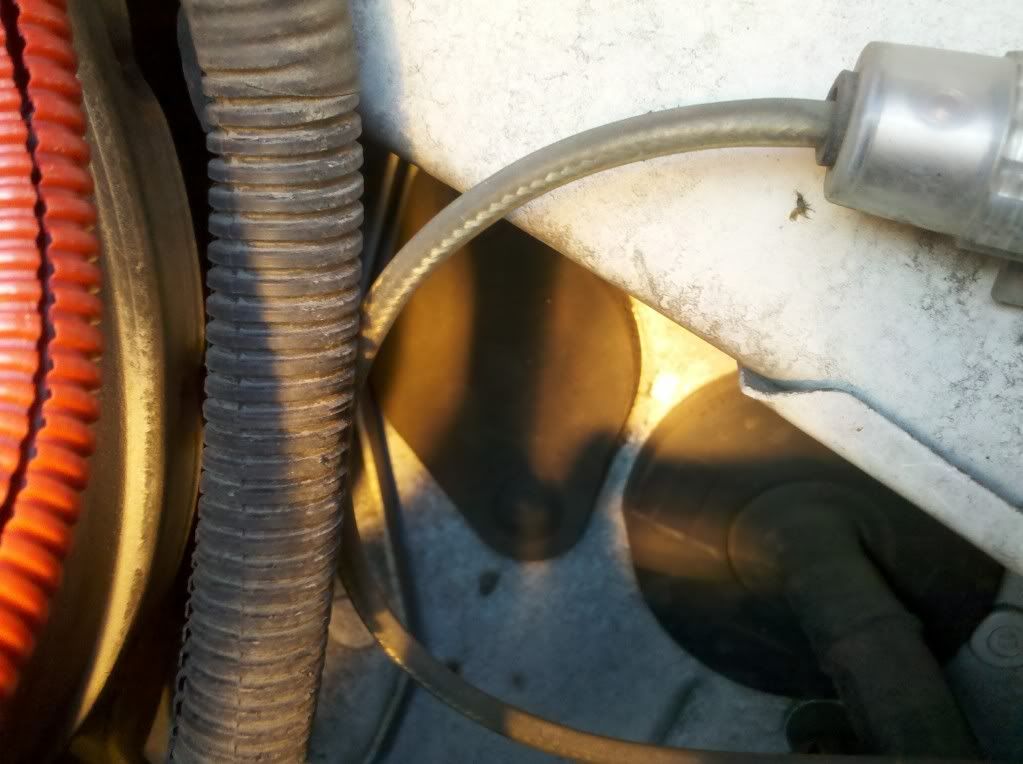
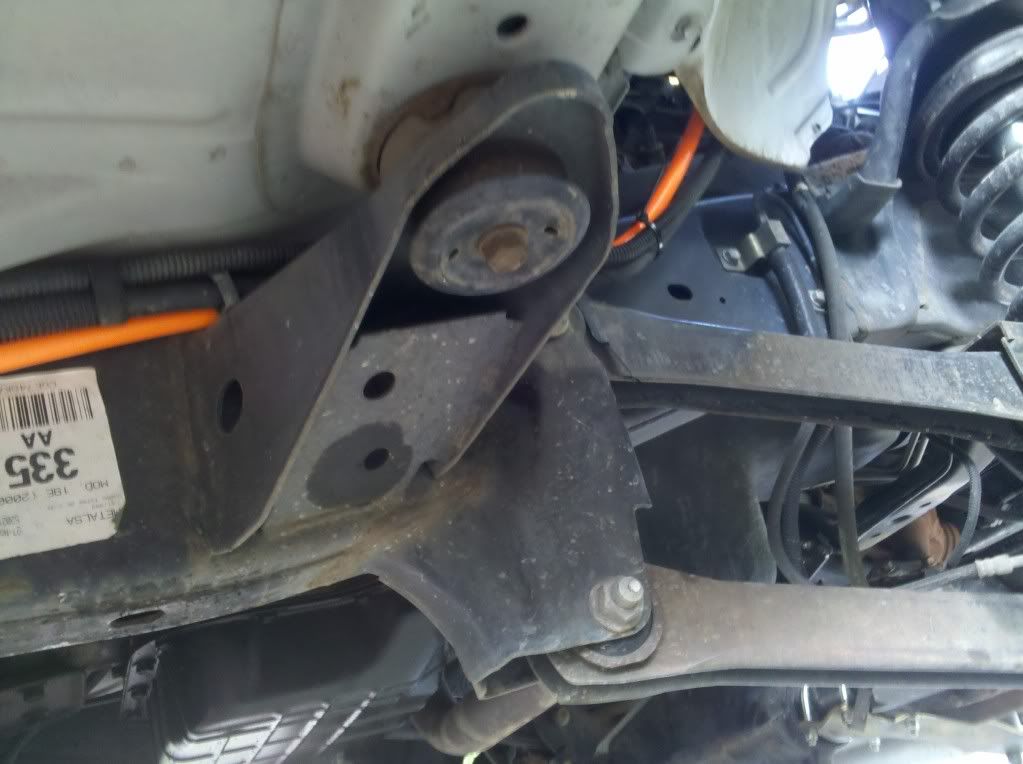
Routed hose down under passenger side. Zip tied to existing vacuum lines and emissions schtuff.

5 gallon tank getting prepped.
More to come. Current system is operational. My hose is rolled up and hung up inside, underneath the bed on passenger side. It's hidden away and partially protected from elements. Plan is to add a 5 port manifold to make for more options.
Plan is to route the hose to the tank. This will be once I've finalized tank location. Considering on front of bed, sideways. Then air hose to be run from tank. I'd like to have the tank mounting be quick disconnect too. Some sort of quick release such that the tank could be filled and taken away from the truck if need be to assist other vehicles.
3:03 am

Club President
April 2, 2003
 Offline
 Nice write up so far. I run that compressor for my ARB's in the JKU. It works great for that purpose.
4:35 am
Any input is welcome. Still in progress and some things can still be worked better. I think my pressure gauge is crap.
Think I should add a water trap?
This must be bit elementary compared to all the built rigs here. Starting from scratch AND will all my extra room is all your gonna get out of me.
Thanks
4:41 am
Good start to your first air system.
One thing you might want to consider though is the use of that quick disco at the comp. Quick disconnects are not used for maintaining air pressure but a connection point to use the air. If you have that tank connected to the air comp by way of an quick disconnect, it will leak by, starting the air comp more often to maintain pressure in your tank.
5:14 am
January 27, 2011
Offline Nice work ... clean install!
=====
If you do not change direction, you may end up where you are heading -- Lao Tzu
5:23 pm
January 27, 2011
Offline Oh, and for the record, I'm paying special attention as I'd like to have OBA as well. ![]()
=====
If you do not change direction, you may end up where you are heading -- Lao Tzu
6:13 pm
"rick-rock" wrote: Good start to your first air system.
One thing you might want to consider though is the use of that quick disco at the comp. Quick disconnects are not used for maintaining air pressure but a connection point to use the air. If you have that tank connected to the air comp by way of an quick disconnect, it will leak by, starting the air comp more often to maintain pressure in your tank.
Thanks for the heads up. What would be the alternative to QCs you'd suggest? I guess any fitting can come to leak, but aren't all shop compressor/tank setups have a QC right after the pressure gauge (e.g, my porter cable 3 gallon)? I only plan to run the compressor upon flipping the cab switch so I'd further minimize frequent re-pressurization. For the tank, in the last picture that is the inlet side. Male fitting, then to ball valve. Outlet side will have attached line with QC for attachments. That's the plan anyways.
8:57 pm
Club Member
September 3, 2008
Offline Nice write up...but I did notice two typos. ![]()
I am paying close attention as well. I need OBA.
Um...what?
3:44 am
I'm curious on how you decided on the ARB compressor? The ARB site says it's good for 2.18 cfm at 29 psi with a 50% duty cycle (30 on/30 off). I'm not seeing a rating at 90 psi (a typical tool pressure). You've obviously got tons of storage, but I think you may struggle to run air tools effectively. Plenty of air for tires/locker though. 8)
4:47 pm
"finder_87" wrote: Nice write up...but I did notice two typos.
I am paying close attention as well. I need OBA.
"Bender" wrote: I'm curious on how you decided on the ARB compressor? The ARB site says it's good for 2.18 cfm at 29 psi with a 50% duty cycle (30 on/30 off). I'm not seeing a rating at 90 psi (a typical tool pressure). You've obviously got tons of storage, but I think you may struggle to run air tools effectively. Plenty of air for tires/locker though. 8)
Quality control is a welcome effort no matter what the topic is. I decided on this compressor only based on the plan for the lockers and capability of filling tires. The air tools usage was a far reaching capability and confirmed dream. 😕 I'm by no means a regular user of air tools. You cite the specs right and this won't be able to run any but one of these.
[Image Can Not Be Found]
I will revise the post to remove misjudgment.
Thanks Bender, you da man!!!
6:02 pm
"Wh1t3Nukle" wrote: [quote="finder_87"]Nice write up...but I did notice two typos.
I am paying close attention as well. I need OBA.
"Bender" wrote: I'm curious on how you decided on the ARB compressor? The ARB site says it's good for 2.18 cfm at 29 psi with a 50% duty cycle (30 on/30 off). I'm not seeing a rating at 90 psi (a typical tool pressure). You've obviously got tons of storage, but I think you may struggle to run air tools effectively. Plenty of air for tires/locker though. 8)
Quality control is a welcome effort no matter what the topic is. I decided on this compressor only based on the plan for the lockers and capability of filling tires. The air tools usage was a far reaching capability and confirmed dream. 😕 I'm by no means a regular user of air tools. You cite the specs right and this won't be able to run any but one of these.
[Image Can Not Be Found]
I will revise the post to remove misjudgment.
Thanks Bender, you da man!!!
I think you'll be able to do better than an air gun! With 5 gallons of storage you may be able to run an impact gun enough to zip on or off some lug nuts, but it would be tight. Worst case blowing the dust off at the end of the day wouldn't be a bad thing. ![]() The reality is most people don't carry air tools. It's a lot of weight to lug around.
The reality is most people don't carry air tools. It's a lot of weight to lug around.
8:03 pm
Club President
April 2, 2003
Offline I don't see the output of the ARB compressor sufficient for air tools. I wonder how many (if any) lug nuts it could spin off. Maybe if they were broken first, it could spin off a wheel at a time...
9:14 pm
The model he's using is the new and improved ARB compressor, not the older, smaller one. It'll be interesting to see how it works in the real world.
9:22 pm
Club President
April 2, 2003
Offline I have that same compressor in my JKU. It is better than the older compressor, but not fast by any means...
10:50 pm
Will report on how ineffective it is to run air tools soon enough.
Just getting down thoughts of the tank install nailed down. Considering using truck bicycle mounts, like this:
[Image Can Not Be Found]
Any flaw seen with this or better ideas? Could use just one and have bracket for the other end where the foot just slides into. This is so the tank can be taken out for any reason. Especially if I've got to transport something big in the bed.
Brad -- does your compressor pressurize up to 70-80 psi or so, assuming you have a pressure gauge installed?
12:29 am
Club President
April 2, 2003
Offline I run arbs. The cut off on mine is 95 psi from what I remember.
3:24 am
Why are you putting the tank in the bed? Put it underneath. It'll be fine down there in the dirt and mud. Plenty of room down there. I wouldn't use any of the valuable bed space.
3:34 am
"BKGM Jeepers" wrote: I run arbs. The cut off on mine is 95 psi from what I remember.
So you put in a higher pressure switch then. The one that comes with the pump kicks off at 70 psi.
"Bender" wrote: Why are you putting the tank in the bed? Put it underneath. It'll be fine down there in the dirt and mud. Plenty of room down there. I wouldn't use any of the valuable bed space.
No, its not going underneath. Made that decision based on the tanks size. Underneath defeats the whole purpose of being mobile, which is one of the features I desire.
3:46 am
Why do you want it mobile?
EDIT: Not trying to judge anything you're doing. Just trying to come up with something that may meet your needs with a slightly different design. I'm trying to imagine what 5 gallons of mobile air at 90 psi (at most) is going to get you. I didn't do the math, but maybe 1 tire from a "wheeling" pressure to a "street" pressure? Ughhh...PV=nRT.
5:17 am
"Bender" wrote: Why do you want it mobile?
EDIT: Not trying to judge anything you're doing. Just trying to come up with something that may meet your needs with a slightly different design. I'm trying to imagine what 5 gallons of mobile air at 90 psi (at most) is going to get you. I didn't do the math, but maybe 1 tire from a "wheeling" pressure to a "street" pressure? Ughhh...PV=nRT.
You judge? No way.  I'm in no way trying to over due this thing. Lot of silly ideas with it is all.
The tank is not strictly for the truck and wheeling. Mobility will help out airing up bikes; floor pump upgrade! Will certainly help me out when I get back to racing next season. I also do a bit of Mtn. biking and it's usually with a group of people.
Misc. usage around the house its much easier to carry this tank relative to my cumbersome Porter Cable pancake compressor. Makes some tasks like clearing gutters, dark holes, leaves, etc. actually fun to deal with. 🙂
The tank can be run much higher pressure than 90. Just get a higher rated switch is all, but not more than 180 psi.
It's a silly convenience perhaps, but it outweighs staying underneath the truck. I've seen under mounted tanks get worked over from element exposure, corroded fittings, etc. So I think I'm going to mount on the passenger side, at front of the bed, running left to right. It's not going on the bed floor.
I like that you dropped the Ideal Gas Law, but boo on not showing your work. ![]() Just use P1V1 = P2V2. I'm not sure what the volume is of my 35" tires. It may be 2 tires filled with tank detached. Totally rough guess.
Just use P1V1 = P2V2. I'm not sure what the volume is of my 35" tires. It may be 2 tires filled with tank detached. Totally rough guess.
5:50 am
January 27, 2011
Offline "Wh1t3Nukle" wrote: [quote="Bender"]Why do you want it mobile?
EDIT: Not trying to judge anything you're doing. Just trying to come up with something that may meet your needs with a slightly different design. I'm trying to imagine what 5 gallons of mobile air at 90 psi (at most) is going to get you. I didn't do the math, but maybe 1 tire from a "wheeling" pressure to a "street" pressure? Ughhh...PV=nRT.
You judge? No way. I'm in no way trying to over due this thing. Lot of silly ideas with it is all.
The tank is not strictly for the truck and wheeling. Mobility will help out airing up bikes; floor pump upgrade! Will certainly help me out when I get back to racing next season. I also do a bit of Mtn. biking and it's usually with a group of people.
Misc. usage around the house its much easier to carry this tank relative to my cumbersome Porter Cable pancake compressor. Makes some tasks like clearing gutters, dark holes, leaves, etc. actually fun to deal with. 🙂
The tank can be run much higher pressure than 90. Just get a higher rated switch is all, but not more than 180 psi.
It's a silly convenience perhaps, but it outweighs staying underneath the truck. I've seen under mounted tanks get worked over from element exposure, corroded fittings, etc. So I think I'm going to mount on the passenger side, at front of the bed, running left to right. It's not going on the bed floor.
I like that you dropped the Ideal Gas Law, but boo on not showing your work. ![]() Just use P1V1 = P2V2. I'm not sure what the volume is of my 35" tires. It may be 2 tires filled with tank detached. Totally rough guess.
Just use P1V1 = P2V2. I'm not sure what the volume is of my 35" tires. It may be 2 tires filled with tank detached. Totally rough guess.
As long as there are folks who understand the Ideal Gas Law, maybe we should use calculus to determine the volume of the tire. We could come close ... just need to determine the equation for finding the volume of a donut. 
Don't laugh, I had to do it in college.
=====
If you do not change direction, you may end up where you are heading -- Lao Tzu
3:38 am
Ok Bender,
I've compromised. 😀 Before I explain, I did plan to put the tank on the passenger side wheel well. To have it wrapped with sheet metal box. It would have been mobile and not consume too much bed space.
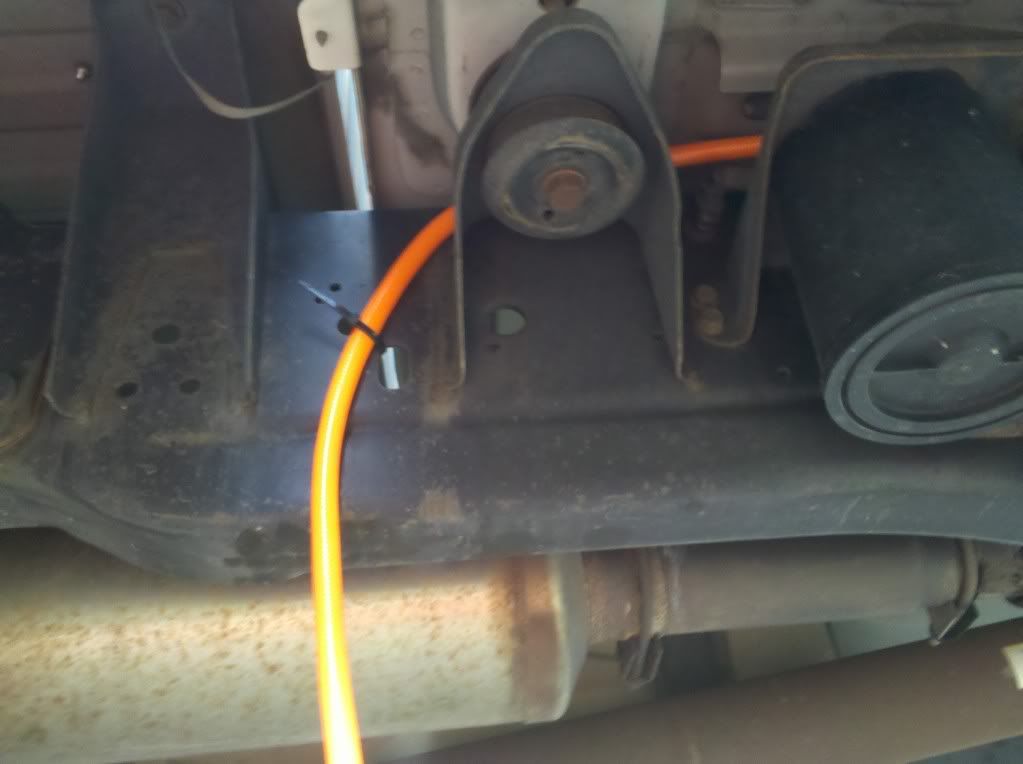
The new setup is actually underneath. Having the spare tire out, which can't fit down there anymore, made it much easier to see what I had to work with. It wasn't that much room actually. So the location is right above the driveshaft. Bumpstops provide ~3" of clearance from center section.
I've mocked up the tank where it's mostly permanent. Simple angle bracket (2 thru bolts) secured to a cross beam of the bed. The forward end of the tank just slips over it. The back end is fixed to a bicycle fork mount. It's pretty solid and so far seems to work.
The front support is incomplete though as it will bounce around. I was thinking of bending to wrap around or maybe get another piece and weld on top to act like a sandwich. I hope that makes sense.
I'd love to hear thoughts on either mounting for flaws and improvements. I'm no fabricator and thought I'd get some better input from you all.
Thanks!


1 Guest(s)

