Don't Forget, meetings have moved to our new location @ Mark and Monica's Family Pizza, 4751 Manzanita Ave., Carmichael, CA 95608!


5:44 am


I've always wanted to do this in lieu of spending >$1200 for one of them behemoths that only uses the stock 3 bolts/side to mount.
I've attempted to retain the use of bolt in 3 on the side, but also 6 more in the front cross member.
Here's a sketch of the target.


Here's a mockup.

Tacked in place

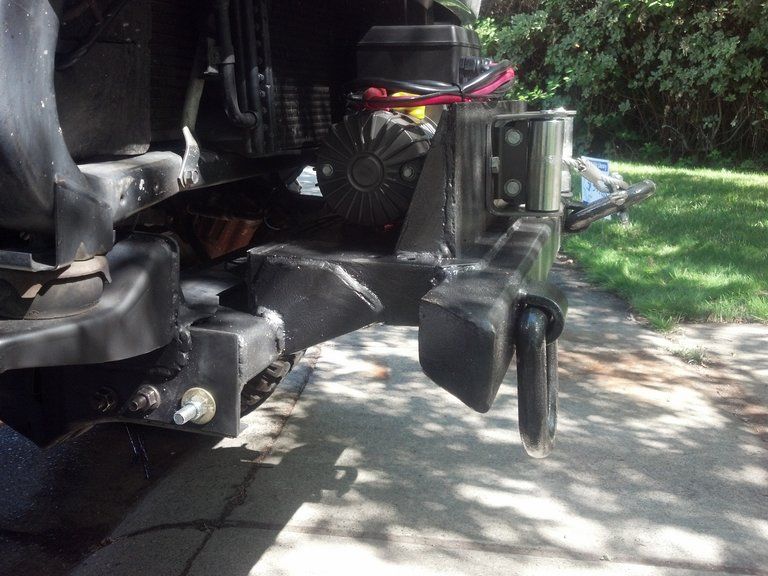
Here's the cross member, showing the bolts. That is the winch plate, which is located much higher.

I've got the core part mounted and 1 weld pass done. Picture is too dark to see very well right now. I aim to have minimum 3 passes for my own practicing and robustness after watching Rick with the sliders.
5:57 am
Where are the cad drawings ?
Didn't pencil renderings go the way of the 8-track tapes ? ![]()
Looks good Carl. Can't wait to see it this weekend.
2:56 pm
Club President
April 2, 2003
 Offline
Great idea, plan and effort Carl!
If I may make one suggestion: I would consider dropping the d-rings you have in that early photo, and instead install a robust set of d-ring tabs. I ran those d-rings on one of my TJ home built bumbers and ultimately sold the bumper to get rid of them. They continuously make noise and rattle as you off-road or crawl along. After 6 hours of hearing them, it gets annoying. The tabs allow you to carry the larger diameter d-rings in your glove box or storage bag and you just pull them out whenever you need them. It is a little less convienent, but you can also use the d-rings to help others where these are hard mounted to your rig. It's just a suggestion based on my past experience.
With your sliders and front bumper you're Rubicon ready!
Kathleen and Brad
4:14 pm
January 27, 2011
Offline
How cool ... never seen anyone make a winch bumper out of a winch before. Very clever.
=====
If you do not change direction, you may end up where you are heading -- Lao Tzu
9:53 pm
CAD is for ppl at work..... 😀
Yeah, I've been bonked by several ppl regarding the cow rings. Much appreciated from Jeff, Joe, and Brad. lol I'll keep them though, however, they won't be mounted as shown in that very early mockup picture. Will have them hanging from the struts, which are 0.25" thick.
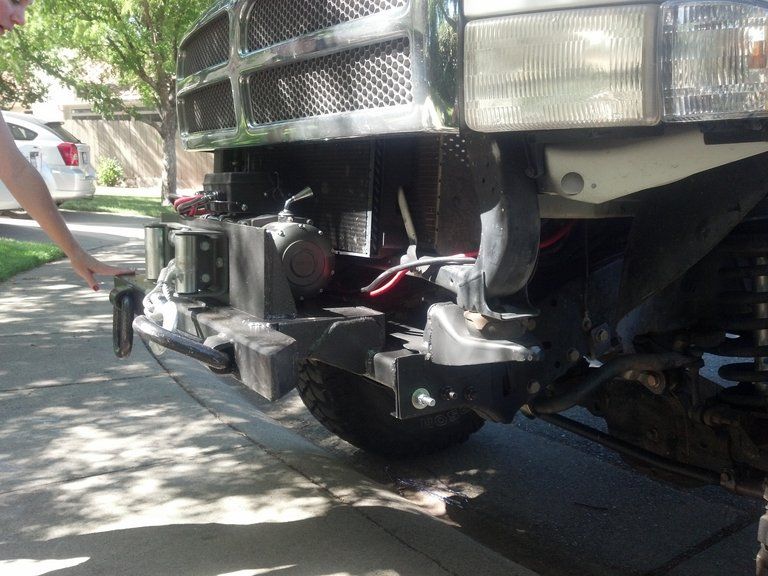
Here's my progress as of today. 60% done
Got some full welds done for the core. Threw down some primer to protect from the oncoming rain...reportedly.
As you can see I'm using the stock bumper brackets. Perfect to locate the height of the plate. Using the tow hook bolts and the tow hook plates themselves to lend their stiffness to the mounting.
Got more to do, such as extending the mustache, adding a center strut, gussets, mount the winch, fab up the fairlead mounting, plating for looks skidding, and then I guess some paint!!
Pulled off:

Mounted for now.

5:46 am
January 27, 2011
Offline
That is going to be one tough looking rig. Nice work!
=====
If you do not change direction, you may end up where you are heading -- Lao Tzu
1:03 pm
Club Member
July 10, 2003
Offline
Good start.
I used to wheel a lot. . .
7:24 am
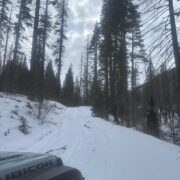
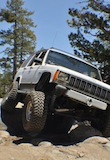
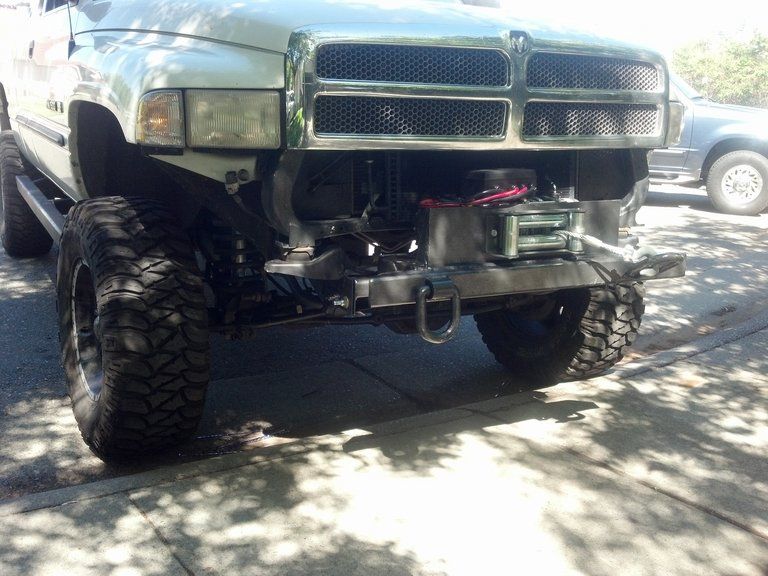
It's definitely an improvement over the stock bumper, which was helped by the body lift. The wheels wells are completely open now.
3:18 pm
January 27, 2011
Offline
Carl, I'm loving watching you do this and I'm getting some ideas of my own from you. That said, I'll probably hold off on building my own bumpers until next year. I'd like to incorporate the winch in the front as well as recover points front and rear thereby getting rid of the receiver hitches ... that is my "dragging point". Well, I'll see how much dragging actually get done this season.
Keep up the GREAT work and I might be tapping you for your expertise shown on one of your prior threads when you installed OBA.
=====
If you do not change direction, you may end up where you are heading -- Lao Tzu
8:00 am
"TomD" wrote: Carl, I'm loving watching you do this and I'm getting some ideas of my own from you. That said, I'll probably hold off on building my own bumpers until next year. I'd like to incorporate the winch in the front as well as recover points front and rear thereby getting rid of the receiver hitches ... that is my "dragging point". Well, I'll see how much dragging actually get done this season.
Keep up the GREAT work and I might be tapping you for your expertise shown on one of your prior threads when you installed OBA.
=====
Tom,
Thanks for the comments and glad I could spark some ideas. This fabbing has been fun...and laborious!!! Can't wait to see your schtuff unfold as well.
Today I got the fairlead plate mounted. I was drawing fabbing block, but Jeff helped me out. One of my goals with the slider/bumper work was to use/reuse as much material as had on hand. Sure enough beveled ends of the sliders (2 of them) were used as the supporting/gussets of the fairlead plate. The plate was donated by buddy Jeff and works perfectly. Thanks dude!!
I'll put a picture when there is daylight though. Working graveyard shift....yes on a Friday night.


6:57 am
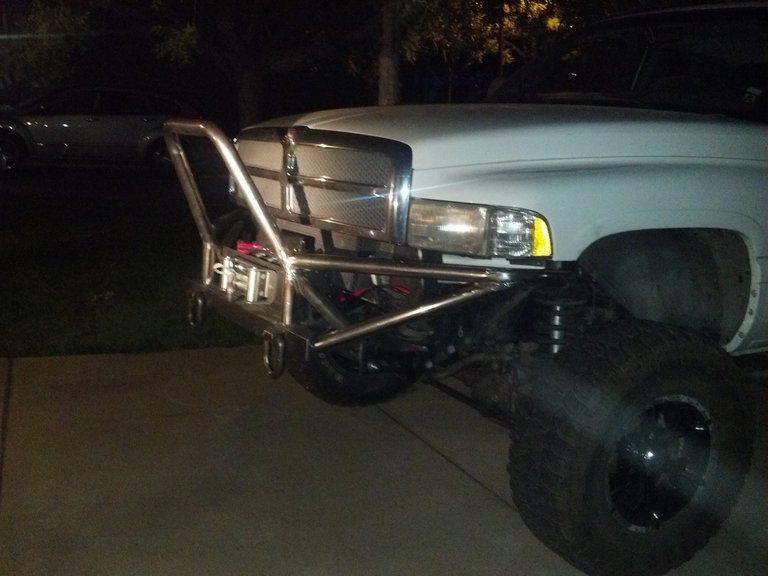
A la winch! Will resume the mustache after vacation. I'm flat out spent.

3:06 am
January 27, 2011
Offline
OH MANNN!! That looks nice!
=====
If you do not change direction, you may end up where you are heading -- Lao Tzu
10:26 pm
"JohnDF" wrote: Good start.
This indeed was just a start in getting a winch mounted. I never intended it to be final, but it also did not get any shakedown until hitting up Strawberry. As a result, I had included or accounted for where the failure would most likely be....
So this will get restarted....
"Bender" wrote: Looking good. How does it change your approach angle?
Since I really don't have much of a lift, ~4" over stock and only 35" tires, the approach angle probably didn't change that much. I neglected to really measure. BUT, I raised the height of the winch as the compromise for clearance and yes this gave a hefty moment arm.
This proved out on Strawberry for the maintenance run in all those stream crossings. Every one of them I dropped in so far down that the bumper was still clearing, rather than digging in. I recall some of the other rigs had to plow some of the ice/snow out with their bumper.
I have the stock bumper back on now and can take the opportunity to measure the approach angle. It's the angle (tangent to tire) from ground to contact on bumper right?
[Image Can Not Be Found]
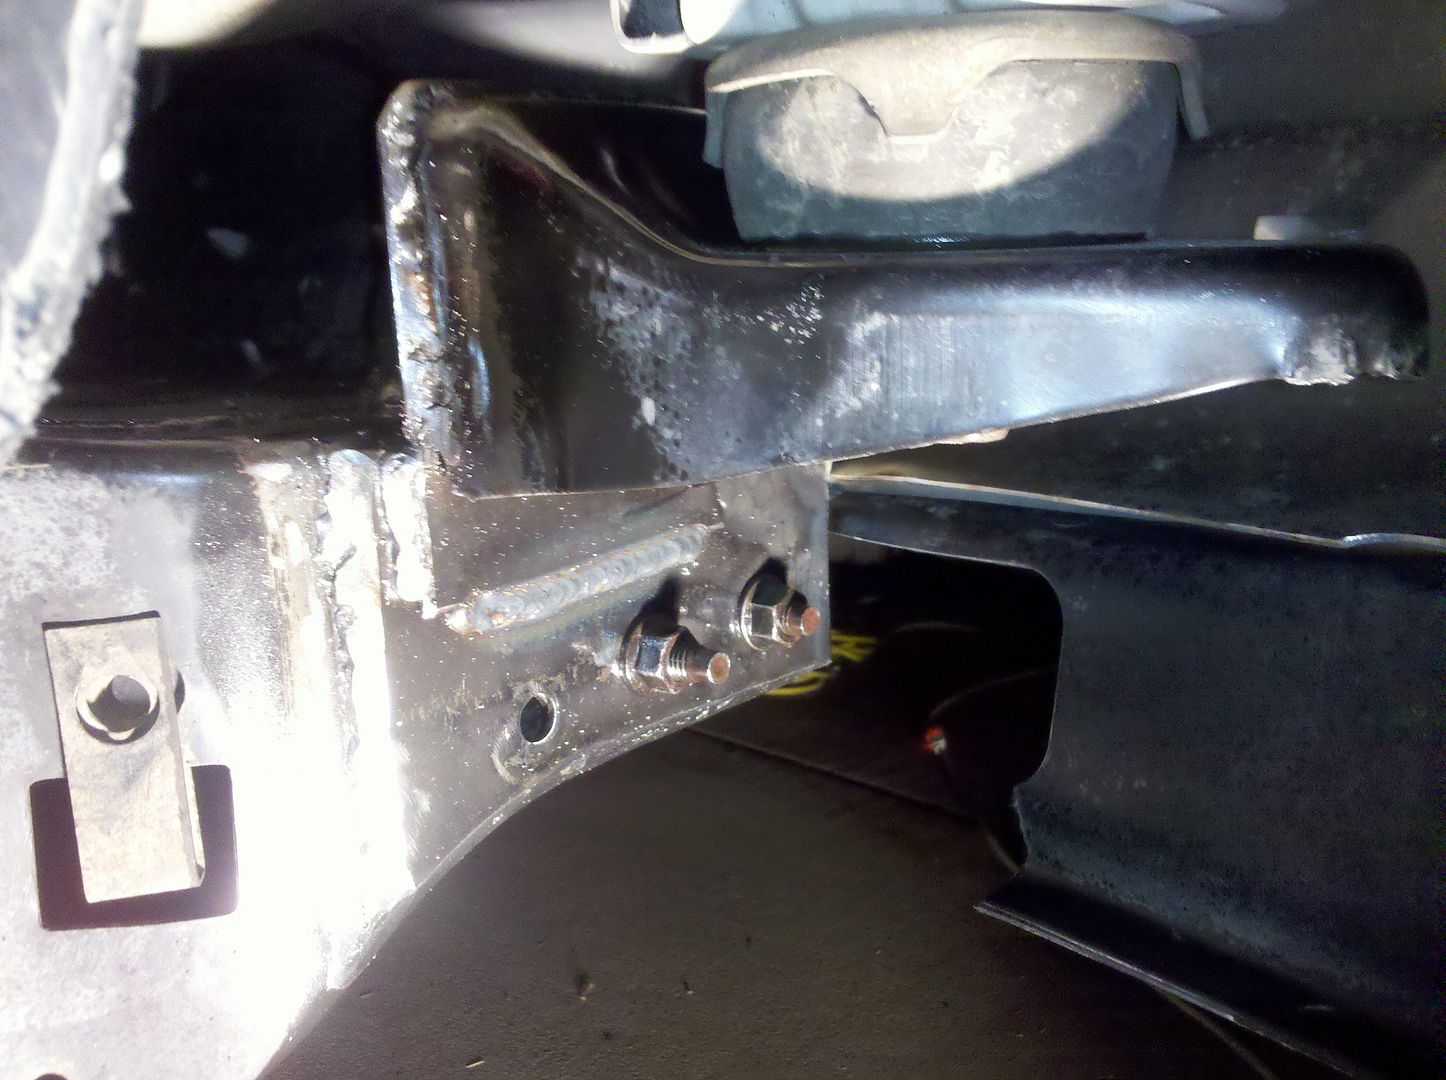
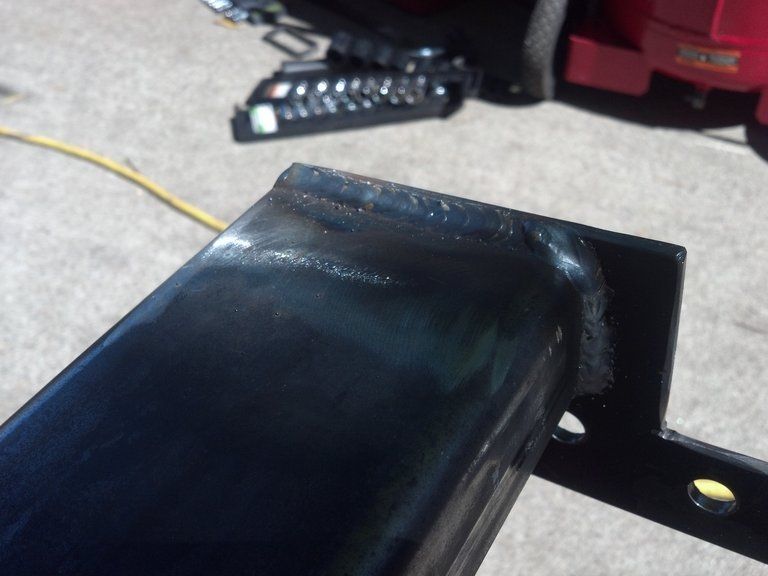
I thought I posted these pictures from the Strawberry run recently. The bolts or the frame were going to be the failure points. In this case, the frame (thin material just a smidge over 1/8" thickness) material was being sheared out by the bolts. This was the intended location as I trimmed off some extension there. Additionally, the deformation was uniform on both sides. You should be able to see the nice bow in the angle iron. 😀
[Image Can Not Be Found]
[Image Can Not Be Found]
Now, this ONLY happened on the 4th winch pull AND it was due to poor observation of the vehicle. Front was butted up against wall of ice. Winch/line was at ground level. Therefore, was just pulling straight into a wall. Dummy me. It didn't completely fail though. 😀 I was really happy with it and my time was limited to squeak this in as I was on Graveyard shift and really pushing the time to work on it.
"Wh1t3Nukle" wrote: CAD is for ppl at work..... 😀
So, I'm going to put some better stuff together in Pro/E just for the heck of it.
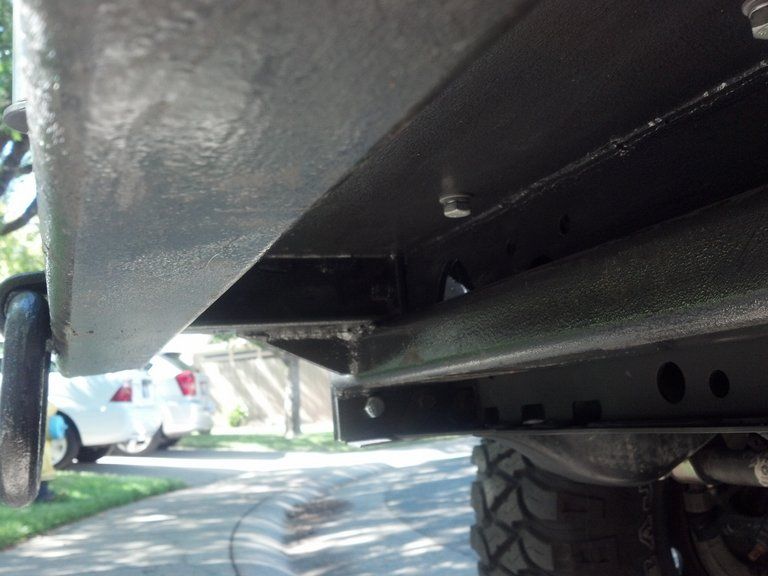
So far though in preparation of the next restarted design, I've cut off the front body mounts and relocated them higher. This gives immediate ground clearance and I lose the 3" BL pucks in that location. Also, I plated the outside of the frame rails in the same location. I also removed the bolt hole that was sheared out. Able to have the stock bumper on in the meantime.
Stock body mount location:

Cut off body mount, mocked up relocation (moved up), and plated reinforcement.

The gussets on the backside to the top of the frame rail are full welded there. There is also a backing plate to box it all off and also fully welded to the top of the frame rail.

more to come....
1:11 am
Engineerically speaking(is that evan a word.....well it should be 🙂 )if you don't break it once in awhile you would'nt know what to fix(reEngineer).
It 's lookin good Carl.Will I get to see it at the club meeting?
5:04 am
^I like that word.
Nothing new to see other than the pictures. Not much time to do more yet. But yeah I'll bring it for your critiquinginginginging.
5:13 am
January 27, 2011
Offline
Looks like this meeting will be quite the show and tell.
If you do not change direction, you may end up where you are heading -- Lao Tzu


2:32 pm


What's left:
A horizontal tube above the winch for future lights.
Few gussets.
Good for now.
6:30 pm
Club Member
September 3, 2008
Offline
Nice D rings!
Um...what?

1 Guest(s)

