5:42 pm
September 25, 2011
 Offline
6:14 pm

Club Member
September 3, 2008
 Offline
8:17 pm
September 25, 2011
 Offline
Not sure. I may sell the Rubicon case and put those funds toward a Rubicrawler instead. The 2.7 ratio currently in the white Jeep is nice for 90% of what we do. I think the 4-1 ratio is too low except in a few specific situations. By adding a Rubicrawler that will give the option of 2.7 or 5.4 which is really the best of both.
Huck
11:04 pm
September 25, 2011
 Offline
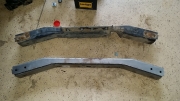
The atlas arrived today. After further inspection of my current cross-member I realized it has a transmission mount welded to it that was part of the Hemi install. After speaking to Burnsville I can get that part for about $40. I think I’m going to order it and go ahead and weld it to the new cross-member vs. trying to cut it off the old cross-member and re-welding. I think it will be cleaner and save some time. In addition I noticed the current cross-member is notched to allow the front drive shaft to clear at full articulation/flex. The atlas is going to move the front driveshaft back an inch or two so the new cross-member will need to be notched as well. Ideally, I need to notch the cross-member and install the transmission mount before I attempt to replace the cross member and install the atlas. I’m going to work on the cross-member this weekend and hopefully get to the Atlas some time next week. Pictures coming..
Huck
6:35 am

Club Member
September 3, 2008
 Offline
8:03 pm
September 25, 2011
 Offline
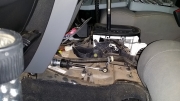
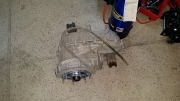
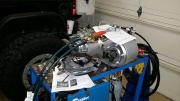
Its install time. I pulled the atlas out of the box (with a cherry picker) and began prepping the Atlas for install this weekend. The instructions are a little lacking, but luckily there is youtube, Jeff, and the guys over at Advanced Adapters to assist and answer questions. The twin shifter cables and the doubler cable is installed in the case and ready to go. The fill line is installed and ready for fluid. The center console of the Jeep has been removed and the transfer case shifter removed.
My goal on Saturday is to
1. Remove the front and rear drive shaft.
2. Remove the Rubicon transfer case.
3. Pull the old crossmember and replace with the new Heavy Duty crossmember
4. Install the Atlas and get measurements for the new drive shafts.
We will see how far we get. Anyone who wants to come by and assist, watch, laugh at mistakes you are more than welcome. Give me a call to get my address. 832-425-9696
Huck
10:08 pm
September 25, 2011
 Offline
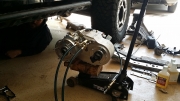
Well, I first want to say thank you to Jeff for coming over and helping with the Atlas. I didn't get as far as I wanted to today. Right now the drive shafts are removed, the cross member is out, I have pulled the Rubicon Transfer Case, the Atlas is prepped and ready to go in. We were within minutes of putting the case in when we had to call it a day. Our main challenge today was that the 6 bolts holding the Rubi Transfer case in place were very hard to reach, especially the top two bolts and the one that holds transfer case cable shifter. All in all it was a good day but I think I need another just as long to finish up. I'll give an update tomorrow night and let you know how it went.
11:49 am
January 22, 2011
 Offline
6:03 pm

Club Member
September 3, 2008
 Offline
12:33 pm
September 25, 2011
 Offline
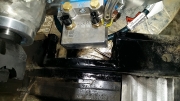
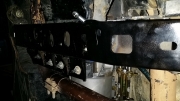
Not yet but getting closer! For starters thanks again to Jeff for coming over on Sunday. We did a ton of work and by the end of Sunday the Atlas was bolted up to the transfer case, the HD cross member was installed, and all that lacked was the electrical wiring and the shifters installed in the cab. We had hoped to get farther on Sunday but due to additional fabrication work that was required to make everything fit it took a lot longer than expected. We had to remove the rear part of the exhaust to make room to install the Atlas. When we went to put it in place we noticed it would not clear a frame brace located behind the old transfer case. So we had to notch that brace, cut some plate to box in the notch, weld, and paint prior to putting the Atlas in. Once the Atlas was installed we moved to the cross member. The new cross member had to mirror the custom fabrication of the old cross member. That required notching, cutting some plate to box in the notch, weld, and paint. Additionally, the new cross member was much less flexible than the old one and reinstalling it took some work.
On Monday I measured for the new drive line lengths and dropped them at West Sac for rebuild and balance. That was all I had time to do.
On Tuesday I picked up the drive lines and again that was all the time I had.
On Wednesday I installed the rear drive line, and main cable shifter in the cab. I have a third shifter that I just can’t figure out where to put. The instructions say to put it on the side of the driver floor pan but I’m worried that location is going to affect my leg room. I am continuing to look for alternative locations online. On Thursday my goal is to finish the electrical, install the front drive line, and hopefully find a spot for that third shifter.
What a project!
Huck
10:39 pm
September 25, 2011
 Offline
One day closer… The electrical is done. The front drive shaft is in. I took it for a drive and it went pretty well. When I went to shift I couldn’t easily get it into low range so I had to adjust the cables. I redid some wiring related to my CB and just cleaned some things up with the center console out. I think the only items I lack are tweaking the exhaust which is happening Monday and to put some miles on it between now and Friday before we leave.
1 Guest(s)


